
For a UK planning committee, you need three things: planning-grade verified views where the site warrants them, proportionate contextual renders that show scale and setting honestly, and a guided-tour slide deck built around one focal point per slide. Get those right and you give officers something they can defend; get them wrong and even a strong scheme can stall.
Need help producing any of these? Visualtrick’s planning visuals service covers the full pack from brief to committee-ready delivery.
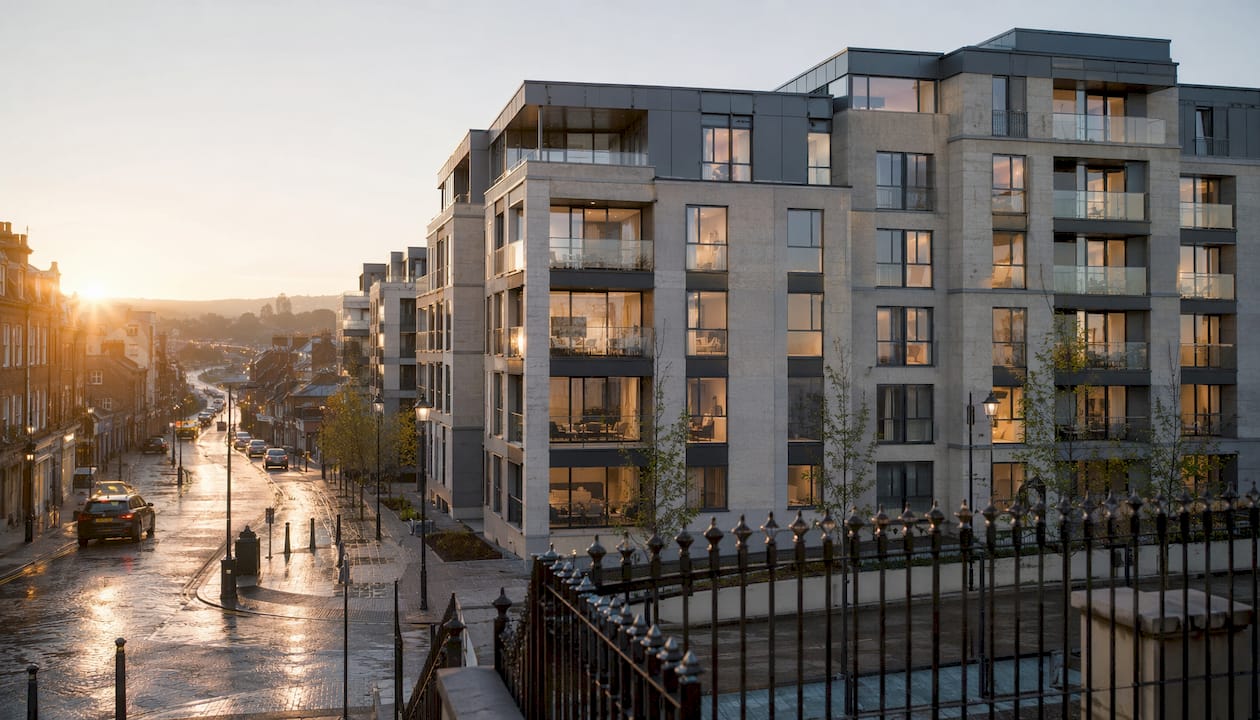
Table of Contents
- Why do planning committees rely on 3D renders?
- What types of 3D render does a planning submission need?
- What technical standards do planning officers expect?
- When should you commission renders, and what do lead times look like?
- How do you design a committee presentation around 3D renders?
- How do you deliver the presentation on the day?
- What documentation should accompany the planning visuals?
- What mistakes most often undermine planning visuals?
- How does Visualtrick prepare planning-grade 3D renders?
- Key takeaways
- What actually wins committees
- Visualtrick’s planning visuals service
- Useful sources and further reading
Why do planning committees rely on 3D renders?
Officers write their reports weeks before a committee meeting. By the time councillors sit down to vote, most have read a dense planning statement and perhaps glanced at floor plans. What they have almost certainly not done is stood on the site and imagined the finished building. That gap between paper and reality is where 3D renders do their work.
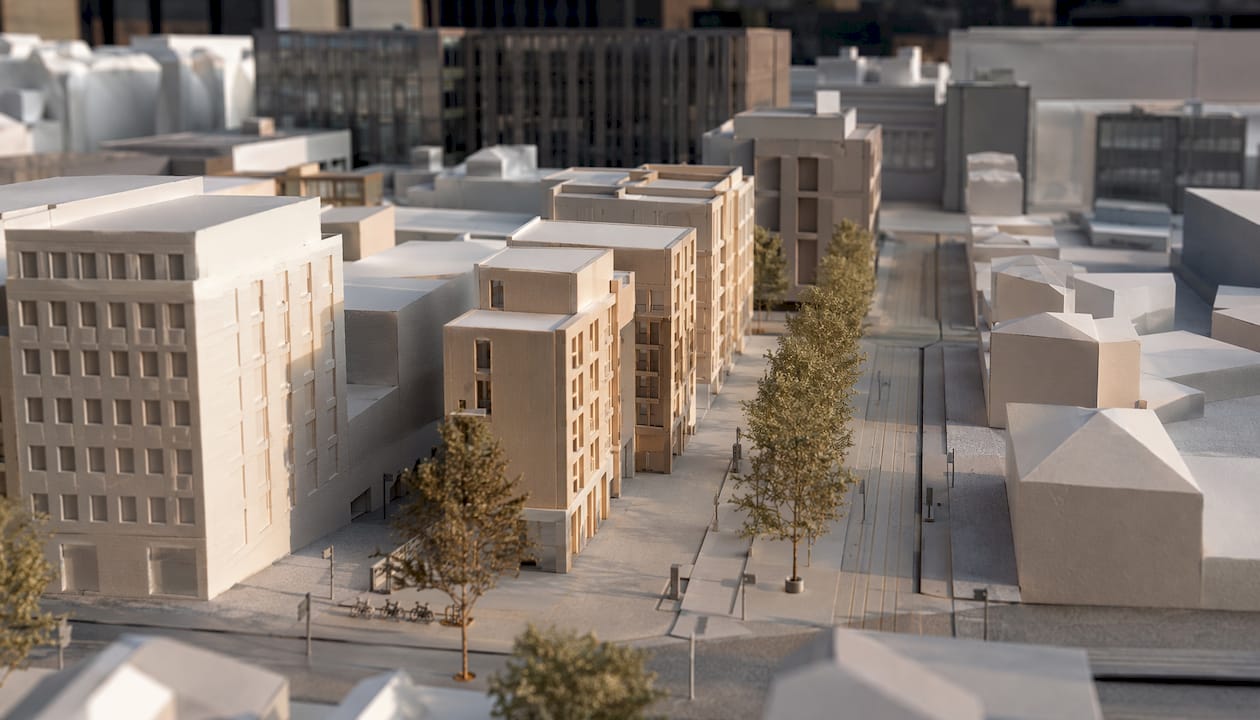
Clear, accurate planning visuals help councillors grasp scale and context in seconds rather than minutes. A verified photomontage showing a proposed building against the existing roofline settles arguments about height that three paragraphs of text cannot. Public objections often hinge on fear of the unknown; a well-composed streetscape view that honestly shows the proposal in context tends to reduce speculative concern, because people can see what is actually proposed rather than imagining something worse.
High-quality 3D renderings help non-technical stakeholders visualise projects and can provide immersive walkthroughs — the same principles apply when presenting to committees, where clarity, scale and atmosphere matter but must be evidence-backed. Officer confidence matters too. A render that comes with a methodology note and verified camera data gives the case officer something concrete to reference in their report. That is a different proposition from a polished marketing image with no supporting evidence.
Proportionality is the governing principle here. A minor householder extension does not need a full verified photomontage; a massing sketch or simple contextual render will suffice. A tall building on a sensitive urban site, or a scheme affecting a designated landscape, almost certainly does require verified views. Matching the level of visual evidence to the planning sensitivity of the site is what separates a credible submission from an over-engineered or under-evidenced one.
What types of 3D render does a planning submission need?
The Visual Representation guidance links the purpose of a visualisation to the level of sophistication it requires. There is no single format that suits every application; the right choice depends on site sensitivity, the nature of the proposal, and what the officer has asked for.
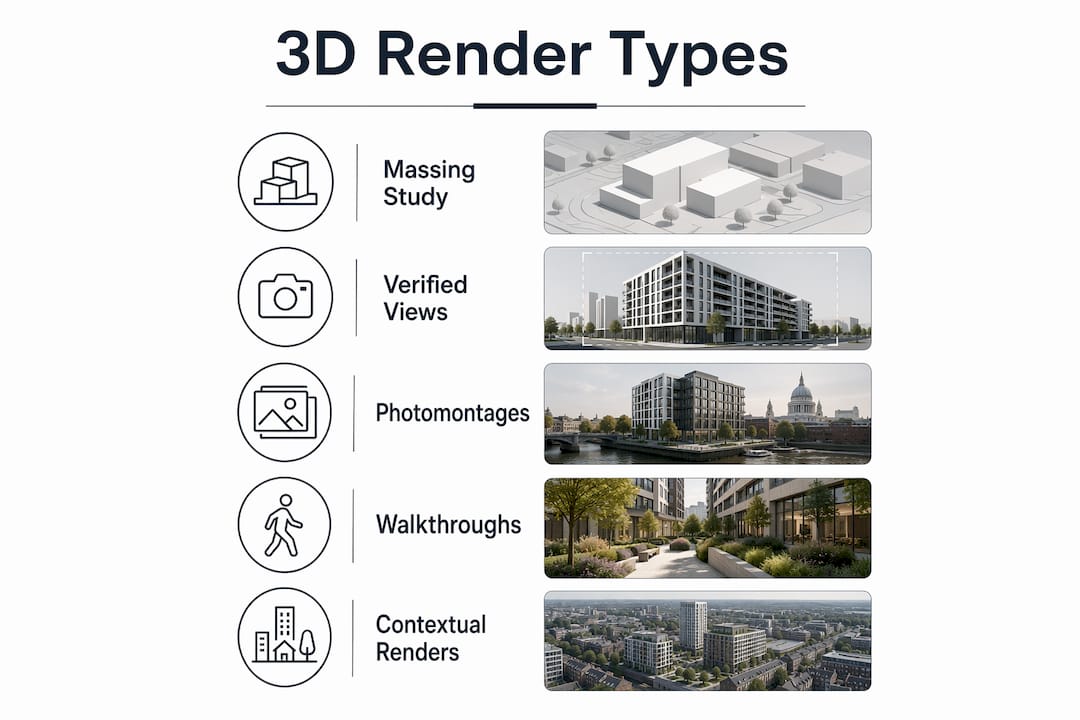
The main planning-grade render types are:
-
Contextual exterior render — shows the proposed building within its immediate setting using accurate geometry and realistic materials. Best for standard residential and commercial applications where the officer needs to assess design quality and neighbourhood fit.
-
Massing or volume study — a simplified three-dimensional model that communicates bulk, height, and footprint without surface detail. Use this for pre-application discussions, outline applications, or any stage where the question is scale rather than appearance.
-
Verified photomontage (verified view) — a composite image that places an accurately modelled proposal into a calibrated photograph taken from a documented camera position. This is the planning-grade standard for sensitive viewpoints. The GLVIA3 guidance sets out the proportionality principle: verified views are required where the visual impact on a sensitive or designated landscape needs to be assessed rigorously, not as a default for every scheme.
-
Streetscape or public realm view — a pedestrian-level perspective showing the proposal in its street context, often used alongside a verified photomontage to show the day-to-day experience of the development.
-
Aerial or bird’s-eye view — useful for large sites, masterplans, or applications where the relationship between the proposal and surrounding development is the key planning question.
-
Augmented reality or virtual walkthrough — increasingly used for hybrid committee meetings and public consultations, though rarely a substitute for verified views in the formal submission.
| Render type | Complexity | Typical lead time | Recommended use |
|---|---|---|---|
| Massing study | Low | 3–5 days | Pre-app, outline, bulk assessment |
| Contextual exterior | Medium | 5 days | Standard full applications |
| Streetscape view | Medium | 5 days | Residential streets, conservation areas |
| Verified photomontage | High | 10 days | Sensitive sites, designated landscapes, tall buildings |
| Aerial view | Medium | 5 days | Large sites, masterplans |
| AR / virtual walkthrough | High | — | Hybrid committees, public consultation |
Lead times assume a complete brief and survey data supplied at the outset. Missing information adds time at every stage.
What technical standards do planning officers expect?
Visuals submitted as planning evidence must be verifiable, not just attractive. The distinction matters because an officer who cannot check the methodology has no basis for defending the image in their report, and a councillor who suspects the render flatters the scheme will say so publicly.
The GLVIA3 proportionality principle governs the level of technical rigour required: select the simplest visualisation that meets the purpose. For a verified photomontage, that means supplying the following metadata with every image:
| Metadata field | Why it is required |
|---|---|
| Photographic location (OS grid reference) | Allows the viewpoint to be independently relocated |
| Camera height above ground | Confirms the view matches human eye level or a stated vantage |
| Focal length (mm equivalent) | Enables the image to be reproduced at the same field of view |
| Date and time of photography | Establishes lighting conditions and seasonal context |
| Terrain model source | Confirms the ground surface used to position the model |
| Model datum (OS level) | Ties the 3D model to the real-world survey datum |
| Software and version used | Allows technical review of the rendering pipeline |
The verifiable photomontage process requires an accurate terrain model, documented camera positions, calibrated focal length, photographic records, and a written verification statement. Verification is normally necessary only for specific circumstances such as important viewpoints or designated landscapes — not every application.
Alongside the images themselves, the submission should include native model files where the LPA has requested them, high-resolution exports (minimum 300 dpi for print), and a methodology note written in plain language. The methodology note is not a technical appendix for specialists; it is the document that lets a councillor or member of the public understand how the image was made and why it can be trusted.
Pro Tip: Supply the camera metadata and terrain sources in a short cover sheet attached to each verified view. Officers can check the methodology without raising a formal information request, which saves time and avoids a delay to the committee date.
For a detailed walkthrough of how a 3D model becomes a planning image, Visualtrick’s technical guide covers the full pipeline.
When should you commission renders, and what do lead times look like?
Commission too late and you are chasing the committee date. Commission too early without a settled design and you pay for revisions. The right moment is after the design has been fixed at RIBA Stage 3 and before the pre-application submission, so the officer can review the visuals and raise any concerns before the formal application goes in.
A rough timeline mapped to the planning process:
- Pre-application stage: commission massing studies and initial contextual renders; share with the officer at the pre-app meeting to agree the level of visualisation required
- Application submission: verified photomontages, streetscape views, and the full contextual render set should be ready and uploaded with the application documents
- Committee preparation (four to six weeks before the date): finalise the guided-tour slide deck, complete the officer pre-brief, and confirm the presentation format with the council’s democratic services team
- 48–72 hours before committee: screen-test the deck in the room or a comparable space, print A3 support boards, and prepare the USB backup
Typical lead times by render type are shown in the table in the previous section. Budget for contingency: a survey that reveals unexpected ground levels, or an officer request for an additional viewpoint, can add a week to the programme. Phased commissioning, where you start with massing and add verified views only when the officer confirms they are needed, keeps costs proportionate and avoids paying for precision that the application does not require.
For a detailed breakdown of the planning application timeline and how visual milestones fit within it, The Extension Works publish a practical guide that maps the full process.
How do you design a committee presentation around 3D renders?
The guided-tour approach works because it mirrors how a good advocate presents a case: one argument at a time, each supported by a single piece of evidence, with no slide doing two jobs at once. Planning presentation guidance recommends grounding the narrative in human experience first, then using technical evidence as verification. That sequence, context before data, is exactly what a committee needs.
A workable eight-slide order for a five-to-ten-minute presentation:
- Site context — aerial or map view showing the site within its wider setting
- Existing conditions — photographs of the site as it stands today
- Design response — the key design move explained in one sentence, illustrated by the massing study
- Verified view A — the most sensitive viewpoint, with the methodology note referenced
- Verified view B or streetscape — the pedestrian-level experience
- Landscape and public realm — mitigation planting, materials, or public space if relevant
- Summary of compliance — one slide showing how the scheme meets the key policy tests
- Officer recommendation — restate the officer’s recommendation and the single most important planning reason to approve
Design rules that apply to every slide:
- One focal point per slide; if you need to show two things, use two slides
- No more than 20 words of text on any slide; use spoken words for explanation
- Title font at least 36pt for a large committee room; body text no smaller than 24pt
- Colour-blind friendly palettes (avoid red/green combinations; use blue/orange or add texture)
- Callout arrows rather than full legends; keep annotation minimal and legible at projection size
- Visuals should emphasise key points, avoid overcrowding, and use photographic images only when crisp and tested at projection size
Pro Tip: Rehearse the full deck projected onto a screen at roughly the same size as the committee room display. Font sizes that look fine on a laptop often become unreadable at 3 metres. Test this at least 48 hours before the meeting, not the morning of.
Presentation design workflow guidance from Visualtrick covers how to sequence visuals for maximum clarity in a committee setting.
How do you deliver the presentation on the day?
Most UK planning committees allow applicants three to five minutes to speak; some extend to ten for major applications. Check the specific council’s speaking guidelines before you arrive, because the time limit is enforced and running over damages credibility.
Rehearsal checklist:
- Time the full presentation twice, once at normal pace and once at the pace you actually speak under pressure
- Practise the opening line tied to the first visual; the first ten seconds set the tone
- Rehearse transitions between slides so you are not looking at the screen
- Prepare one-sentence responses to the three most likely objections (height, traffic, character)
- Confirm the council’s AV setup in advance: HDMI or VGA, resolution, whether you can advance slides yourself or need an operator
Equipment checklist:
- Laptop with the presentation saved locally (not cloud-only)
- USB drive with a PDF backup of every slide
- HDMI cable and a VGA adapter
- Wireless slide advancer (remote control)
- Printed A3 support boards showing the verified views and the site location plan
- For hybrid meetings: a stable internet connection, the meeting link tested in advance, and images compressed to no less than 150 dpi for screen sharing without pixelation
Q&A tactics:
- Hand a simple one-page methodology sheet to councillors before you begin; it pre-empts technical questions
- Repeat the question before answering so the room hears it clearly
- Use one supporting visual per answer; do not scroll through the deck
- Flag officer-endorsed facts first (“the case officer’s report confirms…”) before adding your own interpretation
What documentation should accompany the planning visuals?
Every planning-grade render should travel with a short methodology note. This is not optional paperwork; it is the document that converts a polished image into admissible evidence. Officers who cannot verify the methodology have no basis for endorsing the visual in their report, and a committee that suspects the image is misleading will say so on the record.
Attachment checklist for the planning submission:
- Methodology statement: steps taken to create each view, datum used, photography details, software version
- Photomontage verification report (for verified views): signed statement confirming camera calibration, terrain model accuracy, and composite process
- Terrain data sources: OS terrain model reference or survey data reference
- Survey references: topographic survey date and surveyor details
- Model file references: file name, version, and format of the 3D model used
- Officer pre-brief record: a brief note or email confirming the officer reviewed the visuals before submission
Labelling guidance:
Every image submitted to the LPA should carry a clear, non-marketing title. Use a format such as: “Verified view from Viewpoint A (OS grid ref: TQ 123 456): proposed building relative to church spire, looking north-east.” That single line tells the officer what they are looking at, where the camera was, and what the image is intended to show. Avoid titles like “Artist’s impression” or “CGI of proposed scheme” for planning-grade work; they signal marketing rather than evidence.
For a full breakdown of what constitutes planning-grade visual documents, Visualtrick’s guide covers the documentation requirements in detail.
What mistakes most often undermine planning visuals?
The single most damaging error is submitting marketing imagery as planning evidence. A render that removes neighbouring buildings to open up the view, uses exaggerated soft landscaping to soften the massing, or applies unrealistic lighting to make the scheme look smaller than it is will be challenged. Once an officer or councillor identifies one misleading element, the credibility of the entire submission is in question.
Specific red flags to audit before submission:
- Neighbouring buildings omitted or reduced in height in the contextual model
- Mature trees shown at full canopy where the planting is actually proposed as saplings
- Camera position set lower than eye level to make the building appear smaller
- Missing or incomplete metadata on verified views
- Marketing-style titles on planning images (“stunning new development” and similar)
- Low-resolution images that pixelate when projected in the committee room
- Colour palettes that fail colour-blind accessibility checks (red/green combinations are the most common offender)
- Captions in small type that cannot be read from the back of the room
Hybrid meeting pitfalls:
Compressing images for online sharing is a genuine risk. A verified photomontage that looks sharp on screen can become unreadable when shared via a council’s web conferencing platform if the file has been over-compressed. Export a separate set of screen-optimised images at 150–200 dpi and test them in the actual meeting platform before the committee date. Also confirm whether the council streams the meeting publicly; if so, the images will be recorded and may be scrutinised after the fact.
How does Visualtrick prepare planning-grade 3D renders?
Visualtrick follows GLVIA3 proportionality throughout: the level of visualisation is matched to the sensitivity of the site and the questions the officer needs answered, not to what looks most impressive in a brochure. Verified views are produced where the site warrants them; massing studies are used where they suffice.
Visualtrick’s workflow for a planning pack:
- Brief and data intake: agree the viewpoints, render types, and documentation requirements with the client and, where possible, the case officer
- Survey and model build: construct the 3D model from supplied drawings and topographic survey data, tied to OS datum
- Context verification: source and calibrate the photographic base images; document camera positions, heights, and focal lengths
- Photomontage production: composite the model into the calibrated photographs using the verified view methodology
- QA and methodology note: check all metadata, write the methodology statement, and prepare the verification report
- Officer pre-brief: share the draft visuals with the case officer before finalising, so any concerns are addressed before the committee date
Visualtrick operates across the UK and works with property developers, architects, planners, and planning consultants at every stage of the application process. Examples of successful planning render packages show the range of project types and the documentation that accompanies each pack. For architects specifically, the CGI for architects service covers the full range from pre-application massing to committee-ready verified views.
Key takeaways
Planning committees approve schemes when the visuals are honest, verifiable, and clearly presented. Verified views with full metadata, a proportionate render set, and a guided-tour deck timed to the committee’s speaking limit give officers the evidence they need and councillors the clarity to vote with confidence.
| Point | Details |
|---|---|
| Match render type to site sensitivity | Use verified photomontages for sensitive or designated sites; massing studies suffice for minor applications under GLVIA3 proportionality. |
| Supply full metadata with every verified view | Camera position, height, focal length, terrain model source, and a written verification statement are required for the image to function as planning evidence. |
| Design for the room, not the laptop | Minimum 36pt titles, one focal point per slide, colour-blind friendly palettes, and a screen test in the actual committee room before the day. |
| Commission early and brief the officer | Finalise renders before the pre-application stage so the officer can review and confirm the visualisation approach before formal submission. |
| Visualtrick for planning-ready visuals | Visualtrick produces GLVIA3-aligned verified views, contextual renders, and full methodology packs for UK planning committees. |
What actually wins committees
The conventional wisdom is that better renders win committees. That is only half right. What actually wins committees is evidence that officers can stand behind. A verified photomontage with a clean methodology note is worth more than a photorealistic render that nobody can verify, because the officer can cite the former in their report and defend it under questioning. The render is the vehicle; the methodology is the argument.
There is a tendency, particularly on larger schemes, to over-invest in visual polish and under-invest in documentation. The result is a submission that looks impressive but cannot answer the question a sceptical councillor will inevitably ask: “How do we know this is accurate?” The answer to that question lives in the metadata, the terrain model reference, and the verification statement, not in the quality of the materials texture.
The other thing most guides understate is the officer pre-brief. Getting the case officer to review the visuals before the committee date is not a courtesy; it is a procedural trust signal. An officer who has seen the renders and raised no concerns is an officer who can say, on the record, that the visuals are consistent with the application. That endorsement, even if it is only implicit, changes the dynamic in the room.
Visualtrick’s planning visuals service
Producing a committee-ready pack, from verified photomontages to a guided-tour slide deck, takes time and technical precision that most in-house teams cannot spare in the weeks before a committee date. Visualtrick delivers CGI for planning applications that meet GLVIA3 standards, come with full methodology documentation, and are ready for officer review before submission.

The service covers verified views, contextual exterior renders, massing studies, streetscape perspectives, and complete committee presentation packs. Visualtrick works with developers, architects, and planning consultants across the UK, with expedited turnaround available for urgent committee deadlines. To get a quote or discuss your project’s specific visualisation requirements, visit Visualtrick’s planning visuals page or get in touch directly with your brief, site address, and committee date.
Useful sources and further reading
-
GLVIA3 — Guidelines for Landscape and Visual Impact Assessment, 3rd edition: The authoritative professional standard for landscape and visual impact assessment in the UK. Sets out the proportionality principle and the circumstances in which verified views are required. Essential reading for any practitioner preparing visuals for a sensitive site.
-
Visual Representation of Development Proposals: Practical guidance that amplifies GLVIA3 and provides a framework for selecting the appropriate type of visualisation for planning decision-making. Covers the verifiable photomontage process in detail, including terrain model requirements and verification statements.
-
A Guide to Speaking at a Planning Committee Meeting (Hartlepool Borough Council): A clear, practical guide to the procedural rules for speaking at committee, including time limits and the order of proceedings. Useful for anyone preparing to present in person.
-
Guide to Participant Speaking at Planning Committee (Wychavon District Council): Covers the practicalities of addressing a planning committee, including what to bring, how to structure remarks, and how to handle questions.
-
Hints and Tips for Speaking (Westminster City Council): Westminster’s guidance on presenting to their planning committee; useful as a model for how different councils approach the speaking slot and what they expect from applicants.
-
Planning Permission Drawings: a homeowner’s guide (The Extension Works): Practical guidance on the drawings and documentation required for a planning permission application; useful context for understanding what the LPA expects alongside 3D visuals.
-
Visualtrick planning visuals service: Visualtrick’s dedicated service page for planning-grade CGI, verified views, and committee presentation packs.
