
Photorealistic CGI turns a feasibility study from a stack of drawings into something a planning officer or investor can actually read at a glance. Verified photomontages and context renders show massing, materiality and street relationship in ways that survive scrutiny, but they support judgement rather than replace site assessment or landscape and visual impact analysis. Visualtrick works with developers, architects and planning consultants to produce planning-ready visuals, and the sections below explain what to request, what it costs, and how to brief a studio properly.
TL;DR:
- Using verified photomontages based on surveyor data enhances scrutiny and ensures images can be defended during planning review or public consultation processes.
- Early-stage costs are minimized by starting with massing renders before progressing to detailed exterior and interior visuals, which are more expensive and time-consuming.
- Technical specifications such as high resolution, layered files, and accurate metadata for verified views are essential for creating usable planning-ready images.
- Budget planning should include contingency funds for verified photomontages, especially when visual impact objections or landscape assessments are likely.
- A clear, detailed briefing with accurate survey data, Viewpoint agreements, and revision criteria streamlines production and reduces costly rework later.
Table of Contents
- Why use CGI in a feasibility study?
- What outputs should a feasibility visual package include?
- What technical specs make CGI planning-ready?
- What does feasibility-stage CGI cost, and how long does it take?
- How do you brief a CGI studio for a feasibility project?
- Where does CGI stop and professional assessment start?
- Visualtrick’s approach to feasibility visuals
- Get planning-ready visuals for your next feasibility study
- Sources
Why use CGI in a feasibility study?
A feasibility pack full of elevations and site plans asks a lot of planning committee members who has never trained to read them. Photorealistic renderings solve that translation problem directly, turning technical drawings into images that convey scale and context without a design background attached, which speeds decisions on massing, materials and landscaping before anyone commits money to detailed drawings.
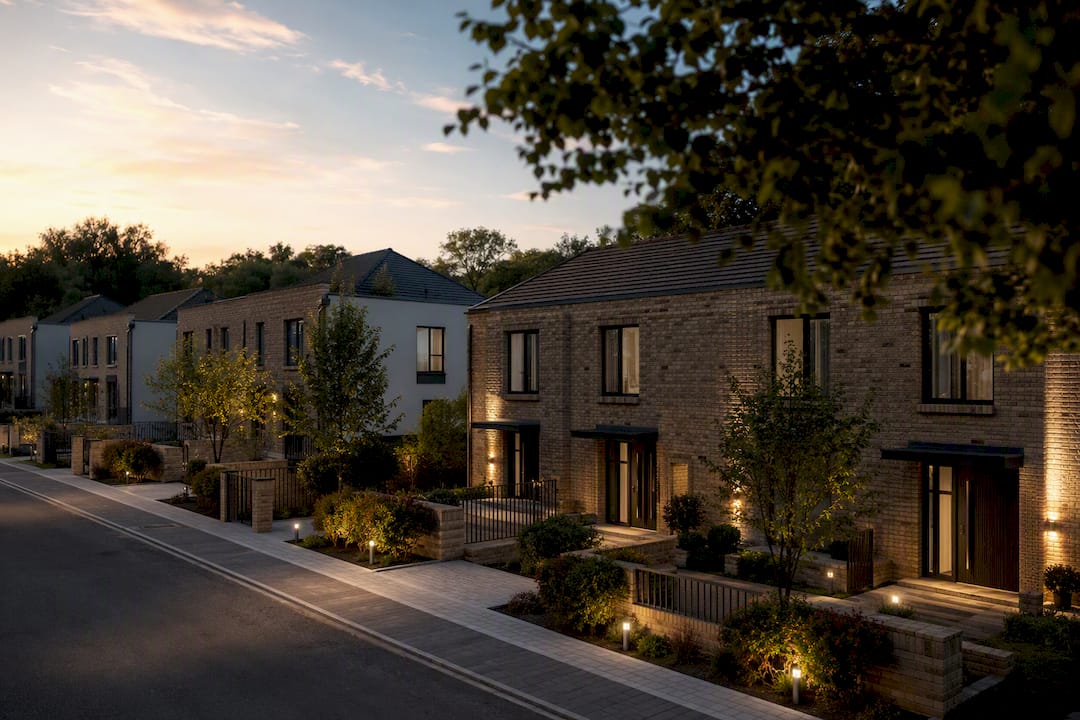
That matters commercially, as shown in the Better Blueprint Realty case study. A strong CGI package functions as both a design tool and a business tool, useful in joint venture discussions and pre-sales marketing as much as in the planning process itself. It also lets teams test decisions cheaply: swap a render’s cladding, adjust a roofline, or trial a different tree line long before committing to a final design.
The practical benefits stack up across a project’s early life.
- Clearer stakeholder communication, especially with non-technical planning officers and lay committee members.
- Faster sign-off on massing and material choices, because everyone is looking at the same image rather than interpreting a drawing differently.
- Reduced risk of late, expensive design changes once construction inputs are locked in.
- Stronger investor materials that sit comfortably in a deck alongside financial projections.
Strong visuals don’t guarantee approval, but the absence of clear visuals can often slow the process, requiring additional clarifications that clear images might have prevented.
What outputs should a feasibility visual package include?
Not every project needs the full suite from day one. The right mix depends on how far along the design is and who the audience will be.
- Exterior context renders — multiple viewpoints showing how the scheme sits against neighbouring buildings, streets and topography. These are the workhorse of most feasibility submissions.
- Verified photomontages (verified views) — built from surveyor data and site photography rather than an approximate camera angle, these are the images that need to withstand scrutiny in a planning application or public consultation, and they should be reproducible from documented source data.
- Interior perspectives and simple flythroughs — useful for placemaking narratives and for investors who need to understand how spaces will actually feel, not just how the building will look from outside.
- Massing and block models with annotated diagrams — the cheapest and fastest output, ideal for early-stage decisions before anyone has agreed final materials or facade treatment.
A sensible sequence starts with massing, moves to verified views once viewpoints are agreed, and adds interiors or flythroughs only where the audience genuinely needs them. Skipping straight to full-detail exterior renders before massing is confirmed is one of the most common ways feasibility budgets get wasted.
What technical specs make CGI planning-ready?
Planning departments and investor audiences both need files they can actually use, at a resolution and format that holds up in print and on screen. A few technical requests up front save weeks of rework later.
- Set a minimum resolution. Ask for a high enough resolution for anything destined for print, and confirm pixel dimensions for large-format boards or exhibition panels.
- Specify file formats. Request TIFF or high-resolution PNG for final images, and layered PSD files where you might need to make small edits without returning to the studio for every tweak.
- Confirm camera and survey metadata for verified views. A verified photomontage needs documented camera position, lens data and a link back to surveyor coordinates, because verified views combine 3D models, surveyor data and photography to produce images that can be checked and defended if challenged.
- Ask for the underlying 3D model export, where licensing allows, so future project stages don’t need to rebuild geometry from scratch.
- Request an annotated viewpoint list, plus a scale bar and north arrow on technical images, so reviewers can orient themselves without cross-referencing a separate site plan.
Getting these specifications agreed before work starts is far cheaper than discovering at submission stage that an image can’t be reproduced or verified.
What does feasibility-stage CGI cost, and how long does it take?
Pricing structures vary by studio, but most fall into one of three shapes: per-image, per-viewpoint, or a fixed package covering an agreed set of outputs. The main cost drivers are modelling detail, the number of verified views required, and how many rounds of revision are built into the quote.
- Massing and block model renders are the fastest and cheapest route to a usable image, often turned around within a few working days once a 3D model exists.
- Verified photomontages take longer because they depend on surveyor coordination and site photography, and the structured, replicable process needed for planning scrutiny adds time that a simple context render doesn’t require.
- Detailed exterior and interior renders with full material and lighting work sit in the middle, and their cost scales with the number of iterations requested.
Pro Tip: Start with a low-cost massing pass to lock scale and orientation before commissioning expensive detailed renders. It’s far cheaper to change a massing model than to redo three finished photorealistic images because the building was too tall.
Build a contingency into the budget specifically for verified photomontages if there’s any chance the scheme will attract objections or need landscape and visual impact input.
How do you brief a CGI studio for a feasibility project?
The quality of the brief determines how much rework follows. A studio can only be as accurate as the inputs it receives, so gathering the right material before the first call saves both time and cost.
- Supply survey and topography data, current CAD or BIM files, and context photography with recorded camera positions.
- Provide material palettes and any known planning constraints, including conservation area rules or design code requirements that will shape material choices.
- Agree viewpoints early, and where the visuals will feed a planning submission, check whether the local authority has specific viewpoint expectations before finalising them.
- Set the number of revision rounds and the feedback format in advance, along with clear approval criteria so sign-off doesn’t drag on indefinitely.
- Commission an early massing pass to confirm scale and siting before committing to detailed material and lighting work, exactly as recommended in the costs and timelines section above.
A studio working from CAD or BIM files and a genuine material schedule will produce accurate renders far faster than one working from a rough sketch and a verbal description, and testing lighting and landscaping choices digitally avoids expensive late changes once construction starts.
Where does CGI stop and professional assessment start?
CGI is a communication tool, not a substitute for expert judgement. Architects and planners rightly stress that visualisation must be paired with proper site assessment, because a beautifully rendered image can still mislead a decision-maker if it misrepresents scale, screening or the true visibility of a scheme from a given viewpoint.
- Never let a render exaggerate distance, downplay a scheme’s height, or omit visible neighbouring structures.
- Use full verified photomontage practice whenever an image is likely to inform an LVIA or feature in public consultation material.
- Keep marketing-style images clearly separate from planning submission images, and label anything illustrative as such.
- Retain source files, document the methodology used, and keep version control across revisions so any challenge can be traced back to its data.
Visualtrick’s approach to feasibility visuals
Visualtrick builds feasibility visuals around survey data from the outset, not as an afterthought bolted on before submission. Workflows integrate surveyor positioning, verification checks against source photography, and staged client reviews so viewpoints are agreed before detailed rendering begins. That sequencing, survey first, verification second, detail third, is what keeps rework low and keeps images defensible if a scheme attracts scrutiny at planning stage.
— Paride
Get planning-ready visuals for your next feasibility study
Visualtrick produces planning-ready CGI, verified photomontages and full deliverable packs built for feasibility studies, planning submissions and investor pitches, not just polished marketing shots.

If you’re heading into a planning submission, preparing an investor deck, or testing a scheme’s feasibility before committing to detailed drawings, get in touch early. Massing studies keep early costs down, verified views protect you at submission stage, and a full annotated deliverable pack means nothing gets held up chasing missing files later. Explore Visualtrick’s architectural visualisation services to see the full range of planning-ready outputs and start a conversation about your project’s viewpoints and timeline.
